tensorflow lite 直接编译通过。
识别速度:155ms
另一个demo编译报错
* What went wrong:
Execution failed for task ':packageDebug'.
> Execution of compression failed.
这个demo可以在 rk3288 上跑
https://github.com/natanielruiz/android-yolo
识别速度有点慢。
tensorflow lite 直接编译通过。
识别速度:155ms
另一个demo编译报错
* What went wrong: Execution failed for task ':packageDebug'. > Execution of compression failed.
这个demo可以在 rk3288 上跑
https://github.com/natanielruiz/android-yolo
识别速度有点慢。
一个基于 Siamese 结构的 Optical Flow 解决方案。
web:http://www.cs.toronto.edu/deepLowLevelVision/
GIT : https://bitbucket.org/saakuraa/cvpr16_stereo_public
闲言:《第一本无人驾驶技术书》第四章提到 Urtasun 教授的一个牛逼解决方案。0.3秒搞定一组双目视觉的深度图。找了下实现的代码,在 GitHub 找了好久,原来在 BBK上。
简单测试
th inference_match_subimg.lua -g 0 --model split_win37_dep9 --data_version kitti2015 --data_root pretrain/kitti2015/sample_img --model_param pretrain/kitti2015/param.t7 --bn_meanstd pretrain/kitti2015/bn_meanstd.t7 --saveDir outImg --start_id 1 --n 1
提前讲文件转为 png格式放在 pretrain/kitti2015/sample_img/image_2 & image_3
命名格式为 00000{num}_10.png 并改 –n 参数为 2
效果。速度比 pyflow 快了不少
GITHUB: https://github.com/tonybeltramelli/pix2code
操作流程见github,非常详细。
一路无话,在公司用 1070训,报
python3 ./train.py ../datasets/web/training_set ../bin
Using TensorFlow backend.
Loading data...
Generating sparse vectors...
Dataset size: 143741
Vocabulary size: 19
Input shape: (256, 256, 3)
Output size: 19
Convert arrays...
Traceback (most recent call last):
 File "./train.py", line 66, in <module>
 run(input_path, output_path, is_memory_intensive=use_generator, pretrained_model=pretrained_weigths)
 File "./train.py", line 24, in run
 dataset.convert_arrays()
 File "/root/code/pix2code/model/classes/dataset/Dataset.py", line 82, in convert_arrays
 self.input_images = np.array(self.input_images)
MemoryError
nvidia-smi 了下,发现有个进程占了2G显存。kill 之,重试还报一样的错误。
重新看了下 github 上的 readme
解决方案,用下面这个语句。也是官方推荐的train方式,之前没仔细看。
python3 ./train.py ../datasets/web/training_set ../bin 1
开始非常愉快的训练了。。。1080ti 大概 18分钟1轮,默认设定为 10轮。
一夜无话。。。。到早上终于训练好了
截了一张博客的图
生成 GUI
python3 ./sample.py ../bin pix2code 1.jpg ../code
生成的GUI,似乎生成的是它演示的哪个页面。不是我提供的图。。奇怪。重新训一下试试。
header{
btn-inactive,btn-active
}
row{
single{
small-title,text,btn-green
}
}
row{
quadruple{
small-title,text,btn-orange
}
quadruple{
small-title,text,btn-orange
}
quadruple{
small-title,text,btn-orange
}
quadruple{
small-title,text,btn-orange
}
}
row{
double{
small-title,text,btn-orange
}
double{
small-title,text,btn-orange
}
}
忘了加 python3 ,默认用 python2 训完了报错
Traceback (most recent call last):
  File "./train.py", line 66, in <module>
    run(input_path, output_path, is_memory_intensive=use_generator, pretrained_m
odel=pretrained_weigths)
  File "./train.py", line 51, in run
    model.fit_generator(generator, steps_per_epoch=steps_per_epoch)
  File "/home/endler/code/pix2code/model/classes/model/pix2code.py", line 70, in
 fit_generator
    self.save()
  File "/home/endler/code/pix2code/model/classes/model/AModel.py", line 18, in s
ave
    self.model.save_weights("{}/{}.h5".format(self.output_path, self.name))
  File "/usr/local/lib/python2.7/dist-packages/keras/engine/topology.py", line 2
580, in save_weights
    raise ImportError('`save_weights` requires h5py.')
ImportError: `save_weights` requires h5py.
哭死,python2.7 没装 h5py。。。还得重训一次。。。。
gogogo,我就不信了。。。
又报这个,不过 权重文件已经生成了。
Exception ignored in: <bound method BaseSession.__del__ of <tensorflow.python.client.session.Session object at 0x7f3f6f67ae80>>
Traceback (most recent call last):
  File "/usr/local/lib/python3.5/dist-packages/tensorflow/python/client/session.py", line 696, in __del__
TypeError: 'NoneType' object is not callable
反复试验了几次,貌似它只能识别 demo 哪几张图。ㄟ( ▔, ▔ )ㄏ
买来的便宜板子的红蓝模式是 红青。。。手头又没有红青眼镜。
本着能动手绝不伸手的原则(其实买个眼镜也就10几块钱。)自己搞之。
摄像头显示左右分割
一直觉得左右分割会有个 split 类似的函数,找了很久也没找到。。。
结果发现,就是这么简单,惊喜不惊喜。。。。
import cv2
import numpy as np

cap = cv2.VideoCapture(0)
while(1):
        ret, frame = cap.read()
        frame_new = frame[0:400,0:400]
        frame_2 = frame[400:800,0:400]
        cv2.imshow("capture",frame_new)
        cv2.imshow("capture2",frame_2)
        if cv2.waitKey(1) & 0xFF == ord('q'):
                break
cap.release()
cv2.destroyAllWindows()
最终的代码
实现的原理,就是合并两个摄像头的红,蓝部分,并去掉绿色部分。
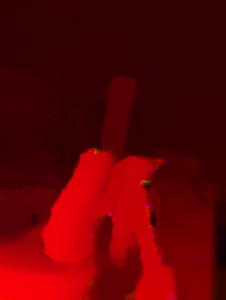
摄像头像素太渣,看不出效果。
import cv2
import numpy as np
import usb.core
import usb.backend.libusb1
cap = cv2.VideoCapture(1)
backend = usb.backend.libusb1.get_backend(find_library=lambda x: "/usr/lib/libusb-1.0.so")
 #
dev = usb.core.find(idVendor=0x18e3, idProduct=0x5031, backend=backend)
dev.ctrl_transfer(0x21,0x01,0x0800,0x0600,[0x50,0xff])
dev.ctrl_transfer(0x21,0x01,0x0f00,0x0600,[0x00,0xf6])
dev.ctrl_transfer(0x21,0x01,0x0800,0x0600,[0x25,0x00])
dev.ctrl_transfer(0x21,0x01,0x0800,0x0600,[0x5f,0xfe])
dev.ctrl_transfer(0x21,0x01,0x0f00,0x0600,[0x00,0x03])
dev.ctrl_transfer(0x21,0x01,0x0f00,0x0600,[0x00,0x02])
dev.ctrl_transfer(0x21,0x01,0x0f00,0x0600,[0x00,0x12])
dev.ctrl_transfer(0x21,0x01,0x0f00,0x0600,[0x00,0x04])
dev.ctrl_transfer(0x21,0x01,0x0800,0x0600,[0x76,0xc3])
dev.ctrl_transfer(0x21,0x01,0x0a00,0x0600,[4,0x00])

while(1):
        ret, frame = cap.read()
        frame = cv2.resize(frame, (1280, 480), interpolation=cv2.INTER_CUBIC)
        frame_new = frame[0:480,0:640]
        b, g, r = cv2.split(frame_new)
        frame_2 = frame[0:480,640:1280]
        b2, g2, r2 = cv2.split(frame_2)
        zeros = np.zeros(frame_2.shape[:2], dtype = "uint8")
        merged = cv2.merge([b,zeros,r2])
        cv2.imshow("br",merged)
        if cv2.waitKey(1) & 0xFF == ord('q'):
                break
cap.release()
cv2.destroyAllWindows()
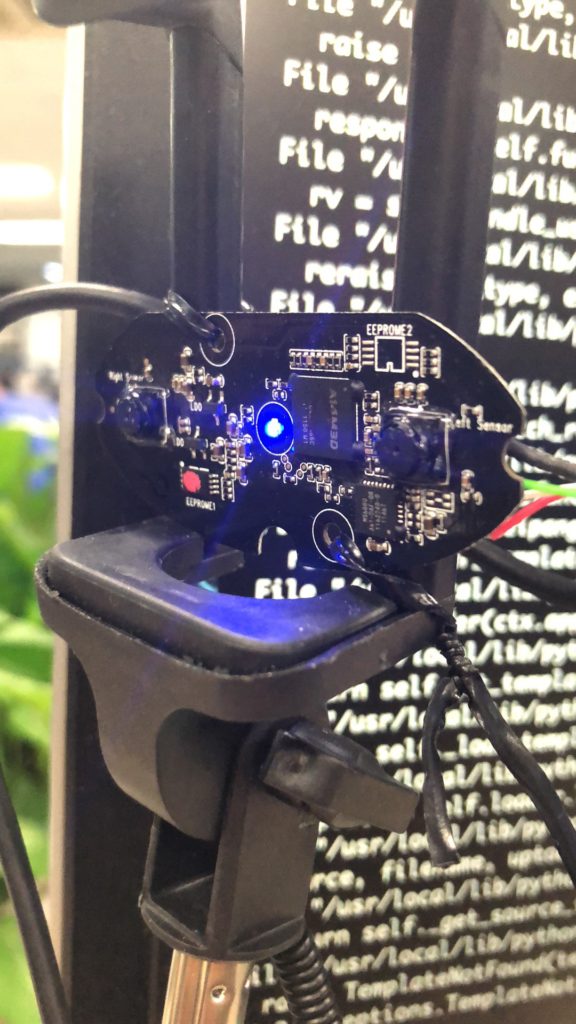
首先你要准备一个3d 摄像头。比如这样的。
28买的。。。640 x 480 ,有色车不推荐买。缺银子的可以考虑。自己焊usb线款的18。
只想本地看的 ,看这篇文章
将摄像头的视频数据通过 RTSP 输出。代码如下。
import cv2
import usb.core
import usb.backend.libusb1
from flask import Flask, render_template, Response

# cam=cv2.VideoCapture(1)
# backend = usb.backend.libusb1.get_backend(find_library=lambda x: "/usr/lib/libusb-1.0.so")
#
# dev = usb.core.find(idVendor=0x18e3, idProduct=0x5031, backend=backend)
# # simulate the SET_CUR sequence
# dev.ctrl_transfer(0x21,0x01,0x0800,0x0600,[0x50,0xff])
# dev.ctrl_transfer(0x21,0x01,0x0f00,0x0600,[0x00,0xf6])
# dev.ctrl_transfer(0x21,0x01,0x0800,0x0600,[0x25,0x00])
# dev.ctrl_transfer(0x21,0x01,0x0800,0x0600,[0x5f,0xfe])
# dev.ctrl_transfer(0x21,0x01,0x0f00,0x0600,[0x00,0x03])
# dev.ctrl_transfer(0x21,0x01,0x0f00,0x0600,[0x00,0x02])
# dev.ctrl_transfer(0x21,0x01,0x0f00,0x0600,[0x00,0x12])
# dev.ctrl_transfer(0x21,0x01,0x0f00,0x0600,[0x00,0x04])
# dev.ctrl_transfer(0x21,0x01,0x0800,0x0600,[0x76,0xc3])

class VideoCamera(object):
 def __init__(self):
 # Using OpenCV to capture from device 0. If you have trouble capturing
 # from a webcam, comment the line below out and use a video file
 # instead.
 self.video = cv2.VideoCapture(1)
 # If you decide to use video.mp4, you must have this file in the folder
 # as the main.py.
 # self.video = cv2.VideoCapture('video.mp4')
 # cam=cv2.VideoCapture(1)
 backend = usb.backend.libusb1.get_backend(find_library=lambda x: "/usr/lib/libusb-1.0.so")
 #
 dev = usb.core.find(idVendor=0x18e3, idProduct=0x5031, backend=backend)
 # # simulate the SET_CUR sequence
 dev.ctrl_transfer(0x21,0x01,0x0800,0x0600,[0x50,0xff])
 dev.ctrl_transfer(0x21,0x01,0x0f00,0x0600,[0x00,0xf6])
 dev.ctrl_transfer(0x21,0x01,0x0800,0x0600,[0x25,0x00])
 dev.ctrl_transfer(0x21,0x01,0x0800,0x0600,[0x5f,0xfe])
 dev.ctrl_transfer(0x21,0x01,0x0f00,0x0600,[0x00,0x03])
 dev.ctrl_transfer(0x21,0x01,0x0f00,0x0600,[0x00,0x02])
 dev.ctrl_transfer(0x21,0x01,0x0f00,0x0600,[0x00,0x12])
 dev.ctrl_transfer(0x21,0x01,0x0f00,0x0600,[0x00,0x04])
 dev.ctrl_transfer(0x21,0x01,0x0800,0x0600,[0x76,0xc3])
 dev.ctrl_transfer(0x21,0x01,0x0a00,0x0600,[2,0x00])
 #1:left 2:right 3:red & blue 4:2to1
 self.dev = dev


 def __del__(self):
 self.video.release()

 def get_frame(self):
 success, image = self.video.read()
 image = cv2.resize(image, (640, 480), interpolation=cv2.INTER_CUBIC)
 # We are using Motion JPEG, but OpenCV defaults to capture raw images,
 # so we must encode it into JPEG in order to correctly display the
 # video stream.
 ret, jpeg = cv2.imencode('.jpg', image)
 return jpeg.tobytes()

# k=0
 # while (k!=ord('q')):
 # ret, frame=cam.read()
 # frame = cv2.resize(frame,(640,480),interpolation=cv2.INTER_CUBIC)
 # cv2.imshow("cam_test",frame)
 #
 # k=cv2.waitKey(18)&0xFF
 #
 # kv=k-ord('0')
 # # print(kv)
 # # if press 1,2,3 or 4, change the 3d camera mode
 # if kv in [1,2,3,4]:
 # dev.ctrl_transfer(0x21,0x01,0x0a00,0x0600,[kv,0x00])

app = Flask(__name__)

@app.route('/')
def index():
 return render_template('index.html')

def gen(camera):
 while True:
 frame = camera.get_frame()
 yield (b'--frame\r\n'
 b'Content-Type: image/jpeg\r\n\r\n' + frame + b'\r\n\r\n')

@app.route('/video_feed')
def video_feed():
 return Response(gen(VideoCamera()),
 mimetype='multipart/x-mixed-replace; boundary=frame')

if __name__ == '__main__':
 app.run(host='0.0.0.0', debug=True)
然后通过访问 http://127.0.0.1:5000/video_feed 试试
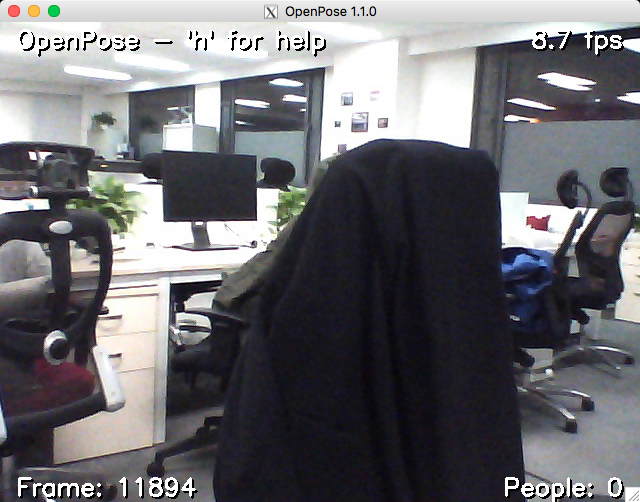
如果可以去 openpose 执行
./build/examples/openpose/openpose.bin –ip_camera http://xxx.xxx.xxx.xxx:5000/video_feed
OK
直接访问 http://127.0.0.1:5000/video_feed 也可以看到,但推流部分还不支持多路并发,有时间再弄。
openpose 如何处理3d 视频流,以后再继续吧。
pip3 install Cython // sudo apt-get install cython3
pip3 install fasttext
pip3 install Pillow
git clone https://github.com/pathak22/pyflow.git
cd pyflow/
python3 setup.py build_ext -i
python3 demo.py    # -viz option to visualize output
修改 demo,把 car1.jpg ,car2.jpg 修改成自己的图片。
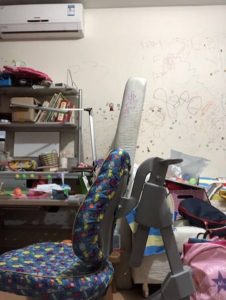
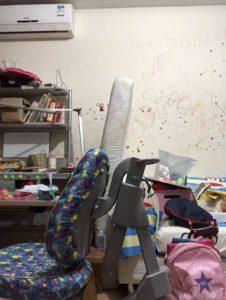
用 iphone 在黑板下沿平移拍的测试。请忽略我家混乱的客厅。/(ㄒoㄒ)/~~
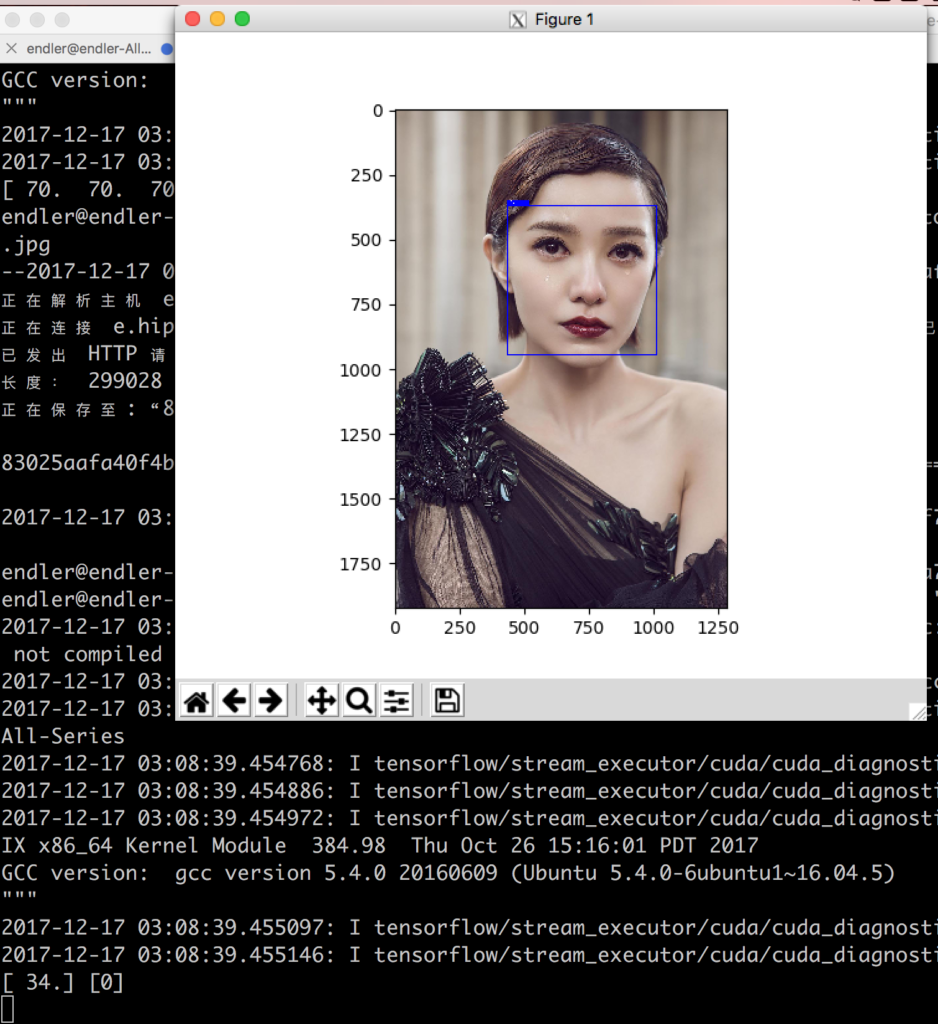
GITHUB:https://github.com//BoyuanJiang/Age-Gender-Estimate-TF
clone 代码。
下载数据集 到 ~/data
wget https://data.vision.ee.ethz.ch/cvl/rrothe/imdb-wiki/static/imdb_crop.tar
加压缩
tar -xvf imdb_crop.tar
数据集预处理
python convert_to_records_multiCPU.py --imdb --nworks 8训练的时候发现输出的文件为空。
try 了一下
example = tf.train.Example(features=tf.train.Features(feature={
 # 'height': _int64_feature(rows),
 # 'width': _int64_feature(cols),
 # 'depth': _int64_feature(depth),
 'age': _int64_feature(int(ages[index])),
 'gender': _int64_feature(int(genders[index])),
 'image_raw': _bytes_feature(image_raw),
 'file_name': _bytes_feature(str(file_name[index][0]))}))
报错
’40/nm1102140_rm3713850624_1974-7-29_2013.jpg’ has type <class ‘str’>, but expected one of: ((<class ‘bytes’>,),)
去掉
'file_name': _bytes_feature(str(file_name[index][0]))程序可以正常跑了
训练的时候报错
Invalid argument: Name: <unknown>, Feature: file_name (data type: st
ring) is required but could not be found.
修改 file_name 行如下
'file_name': _bytes_feature(bytes(file_name[index][0],'utf-8'))}))
重新生成。。。
或者换成
python convert_to_records.py –imdb
就好了。
下载models:https://pan.baidu.com/s/1dFewgqH
训练好的model
https://pan.baidu.com/s/1bpllJg7
Train
python3 train.py --lr 1e-3 --weight_decay 1e-5 --epoch 6 --batch_size 128 --keep_prob 0.8 --cuda
Test 选出最好的模型
python3 test.py --images "./data/test" --model_path "./models" --batch_size 128 --choose_best --cudaAge_MAE:7.07,Gender_Acc:80.92%,Age_model:./models/model.ckpt-12001,Gender_model:./models/model.ckpt-9001
用自己的图片测试
python3 eval.py --I "./demo/demo.jpg" --M "./models/" --font_scale 1 --thickness 1
另一个Keras 的实现: Keras 实现的性别年龄检测
淘宝 买了俩双目摄像头。28块钱一个。
货还没到,通过图片搜到 产品型号是 chusei 3d webcam
mac 下的测试代码
brew install  libusb

pip3 install pyusb libusb1  libusb
# need pyusb and python binding for opencv
# also need libusb installed
import cv2
import usb.core
import usb.backend.libusb1

cam=cv2.VideoCapture(1)   #mac 原生为 0,如果只有一个摄像头请用0

backend = usb.backend.libusb1.get_backend(find_library=lambda x: "/usr/lib/libusb-1.0.so")   #backend,不加会报错 No backend available
dev = usb.core.find(idVendor=0x18e3, idProduct=0x5031,backend=backend)
# simulate the SET_CUR sequence
dev.ctrl_transfer(0x21,0x01,0x0800,0x0600,[0x50,0xff])
dev.ctrl_transfer(0x21,0x01,0x0f00,0x0600,[0x00,0xf6])
dev.ctrl_transfer(0x21,0x01,0x0800,0x0600,[0x25,0x00])
dev.ctrl_transfer(0x21,0x01,0x0800,0x0600,[0x5f,0xfe])
dev.ctrl_transfer(0x21,0x01,0x0f00,0x0600,[0x00,0x03])
dev.ctrl_transfer(0x21,0x01,0x0f00,0x0600,[0x00,0x02])
dev.ctrl_transfer(0x21,0x01,0x0f00,0x0600,[0x00,0x12])
dev.ctrl_transfer(0x21,0x01,0x0f00,0x0600,[0x00,0x04])
dev.ctrl_transfer(0x21,0x01,0x0800,0x0600,[0x76,0xc3])

k=0
while (k!=ord('q')):
 ret,frame=cam.read()
 frame = cv2.resize(frame,(1280,480),interpolation=cv2.INTER_CUBIC)
 cv2.imshow("cam_test",frame)

k=cv2.waitKey(18)&0xFF
 kv=k-ord('0')
 # print(kv)
 # if press 1,2,3 or 4, change the 3d camera mode
 if kv in [1,2,3,4]:
 dev.ctrl_transfer(0x21,0x01,0x0a00,0x0600,[kv,0x00])
基于如下网址: http://www.jianshu.com/p/2ce302d588a0
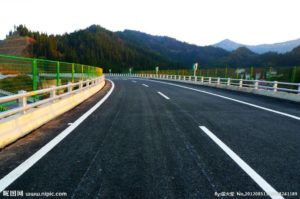
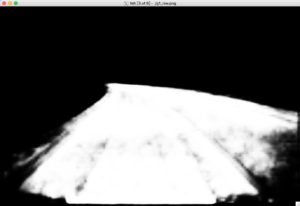
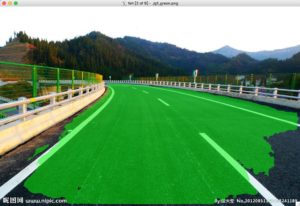
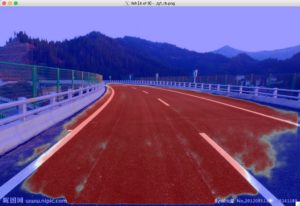
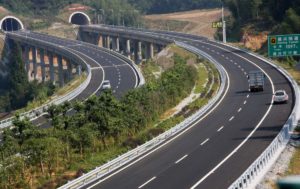
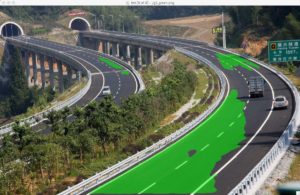
GITHUB:https://github.com/MarvinTeichmann/KittiSeg
git clone https://github.com/MarvinTeichmann/KittiSeg.gi
cd KittiSeg
git submodule update --init --recursive

python download_data.py --kitti_url  http://kitti.is.tue.mpg.de/kitti/data_road.zip

python3 demo.py --input_image data/demo/demo.png
自己找了几张图测试,效果还行。
待解决:
libcudnn.so.6: cannot open shared object file: No such file or directory
$ tar -xzvf cudnn-9.0-linux-x64-v7.tgz
$ sudo cp cuda/include/cudnn.h /usr/local/cuda/include
$ sudo cp cuda/lib64/libcudnn* /usr/local/cuda/lib64
$ sudo chmod a+r /usr/local/cuda/include/cudnn.h
/usr/local/cuda/lib64/libcudnn*
2017-12-15 12:25:14.185527: I tensorflow/core/common_runtime/gpu/gpu_device.cc:1030] Found device 0 with properties:

name: GeForce GTX 1080 Ti major: 6 minor: 1 memoryClockRate(GHz): 1.62

pciBusID: 0000:01:00.0

totalMemory: 10.90GiB freeMemory: 10.46GiB

2017-12-15 12:25:14.185550: I tensorflow/core/common_runtime/gpu/gpu_device.cc:1120] Creating TensorFlow device (/device:GPU:0) -> (device: 0, name: GeForce GTX 1080 Ti, pci bus id: 0000:01:00.0, compute capability: 6.1)
https://github.com/udacity/self-driving-car-sim
教程:https://www.leiphone.com/news/201706/RuoKaDSTmd1dClUV.html
运行训练好的模型。详细请看 github
sudo pip3 install python-socketio
sudo pip3 install eventlet
sudo pip3 install flask
sudo pip3 install Keras==2.0.3
sudo pip3 install h5py
python3 drive.py model.h5
下载 对应系统的 模拟器
https://d17h27t6h515a5.cloudfront.net/topher/2017/February/58983385_beta-simulator-mac/beta-simulator-mac.zip

https://d17h27t6h515a5.cloudfront.net/topher/2017/February/58983558_beta-simulator-linux/beta-simulator-linux.zip

https://d17h27t6h515a5.cloudfront.net/topher/2017/February/58983318_beta-simulator-windows/beta-simulator-windows.zip
自带的 模型不好用,会报错。自己训练之。。。开车保存数据见教程。
请不要更改IMG 目录位置,会找不到文件。
训练30轮之后,大概是这个效果
python3 drive.py model_best.h5
https://medium.com/@kyle.vogt